Operation Martlet: Striking at St Nicholas II (Table 4, Turn 8)
St Nicholas' farm proving a tough nut to crack, Lt Clavell's request for additional Company and Battalion level support is granted: he's assisted by two additional Churchill AVREs from the engineers, an extra rifle section from a sister platoon, one more PIAT team, and an adjutant - heavy support reflecting the growing material might of the Allies. Obsershcarfuhrer Shnatz is slightly less supported, but not too poorly: he's positioned an MG-42 on tripod mount in the entrenched position at the end of the orchard, as well as a Pak 40 tucked away in the wheat field. Plus, he still has his attached Panzer IV up his sleeve.
As the sun sits high in the sky, Sgt Buckley, as usual, leads the way through the orchard, backed up by the attached rifle section and the PIAT team. Behind them, waiting for the infantry to secure their front, are two rumbling Churchill AVREs.
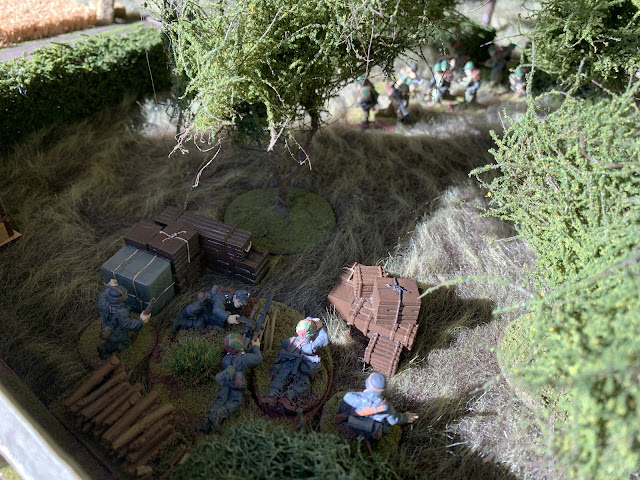
With Buckley and his men approaching the farmhouse, the snarl of an MG-42 rips the air to their front and one of his riflemen goes down. Spotting the menace amidst the trees, he orders his rifles and Bren to open up on the MG position. The entrenchment provides little cover as the focused fire of a rifle section whittles away at them, forcing their heads down. Without any NCOs to keep them in place, they haul backwards toward the farmhouses, abandoning their position.
 |
| The ill-fated MG-42 team |
Scharfuhrer Ruel and his squad of panzergrenadiers rush towards the barn, in a desperate attempt to deny the building to the onrushing British. Cpl Holmes decides, with the MG position destroyed, to take his section round the opposite side, looking to flank the farmhouse and avoid the open wheat fields. To his misfortune, he leads his men into an ambush as a team of Germans in the apple trees catches them mid step with their LMG. Fortunately for Holmes' section, the fire misses, merely rattling the men as the Germans disappear out of sight.
 |
| Cpl Holmes and his section cautiously advance... |
 |
| ...only to step into a German ambush! (with little effect) |
On the opposite flank, the NCO commanding the Pak 40 waits for his opportunity. As the two Churchills rumble forward, he sees his chance and commands the gun to fire. The round soars toward the lead AVRE, rattling it's turret.
 |
| The Pak 40 crewmen await their chance |
As the round impacts, with shrapnel peppering his arm, the tank commander directs his machine's spigot mortar towards the wheat field. The second Churchill fires in concert, and the combined force of two AVREs on a single AT gun is enough to see the surviving gun crew abandon their Pak 40 and flee.
As the Churchills deal with one threat, the Panzer IV rumbles forward and maneuvers behind the farmhouses, in an attempt to catch the British as they leave the orchard. Observing the flank collapse, and not wanting to be in a building exposed to AVREs, Ruel pulls his squad out of the barn, and withdraws to the rear-most farmhouse - ready to make a stand.
 |
| The Panzer IV rushes to stem the British tide |
 |
| Scharfuhrer Ruel falls back to a safer position (i.e. one out of sight of the AVREs) |
Holmes and his section leave the orchard and approach the farmhouse just as they hear the clank of tank treads to their front. He orders his men through the many windows on the ground floor, hoping to get them out of sight before the beast catches sight of them. As the last man slips through his window, the Panzer IV rounds the corner, none the wiser.
Ruel, fully aware of the Brits across the courtyard from them, departs the building via the back door, trying to get the Panzer IV's attention. Leaving the house, they hear the approach of the pair of AVREs - the British noose closing around them. With minimal losses to his platoon, and the position becoming untenable, Oberscharfuhrer Schnatz sounds the retreat. They'll make their next attempt where they can catch the British in the open.
 |
| Ruel frantically trying to grab the tank commander's attention |
Lt Clavell's platoon managed to get by without any losses, even being rejoined by the one man patched up from a few hours before. His men are quite pleased with how quickly the Germans folded and how lightly they took the farm, as is his commanding officer. His CO is "reinforcing success", promising additional support in the future. Clavell, himself, is still feeling fairly secure. Schnatz, on the other hand, is still glued to the bottle, though not out of merriment anymore, but is feeling rather cynical. His CO is likewise disenchanted with their loss of the farm, having expected it to be a much stronger position. His men are well pleased with their absence of losses thus far and their personal prospects on survival, but they're now entering the open country between the farm and Rauray, where victory could be decided by a flip of a coin.
I made a fair few mistakes that caused the disaster that this scenario turned out to be, namely the piecemeal commitment of my support options. I was hoping that the entrenched tripod MG-42 would've devastated the approaching Tommies, but without any NCO support to spare, they were unable to withstand the shocking firepower directed at them. Same story with the Pak 40. All that said, -A- played a careful game, bringing her AVREs on together, keeping her PIAT always close to the front yet still out of sight. I was hoping to make more of a fighting withdrawal, but ended up getting cornered in the rear. All the same, we had an enjoyable game and are now entering some fairly open country. We'll see you then!
Caleb
Comments
Post a Comment