Skip to main content
Search
Search This Blog
Touch and Go Wargames
Home
Campaign AARs
More…
Posts
Latest Posts
May 02, 2025
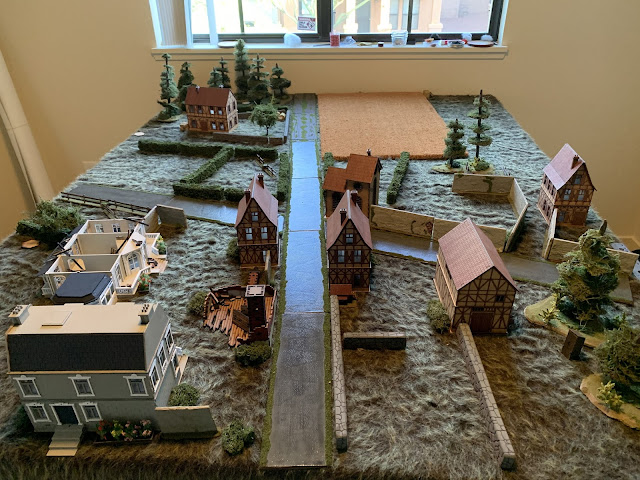
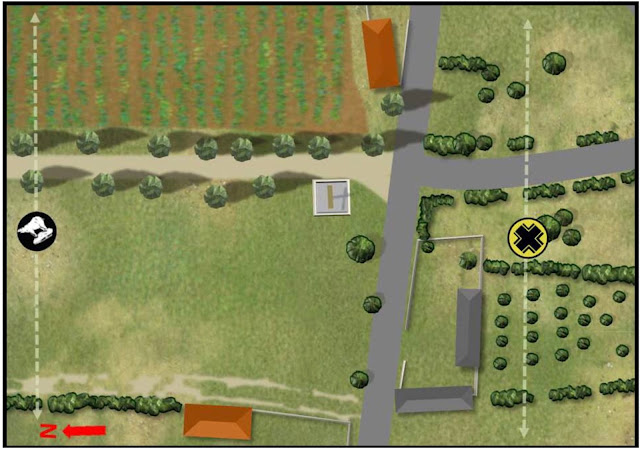
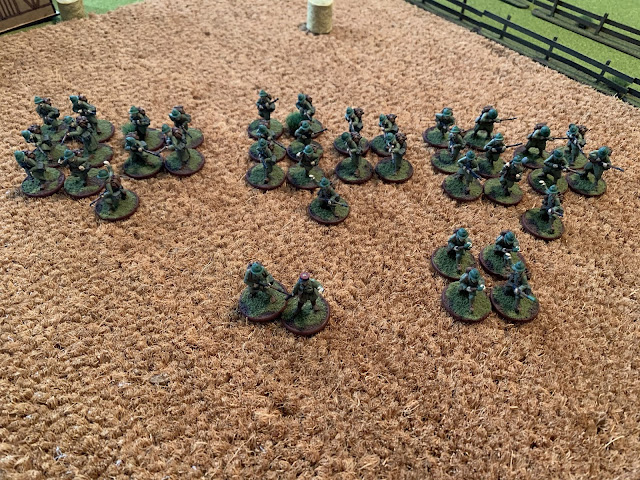
Platoon Forward (Operation Overlord) - Into the Mist (Engagement 1)
May 02, 2025
Platoon Forward (Operation Overlord) - Cast and Crew
February 09, 2024
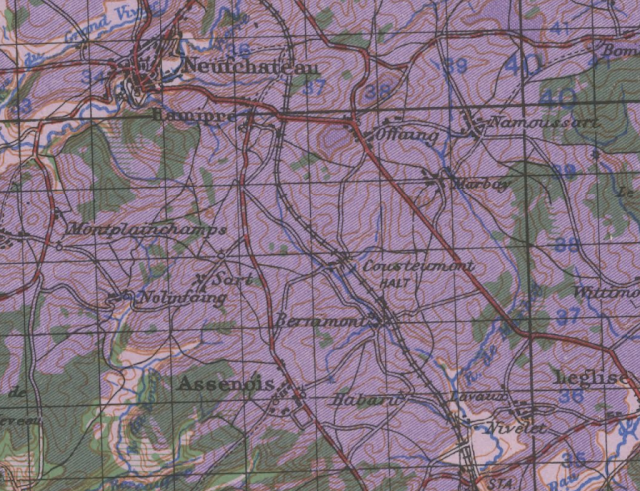
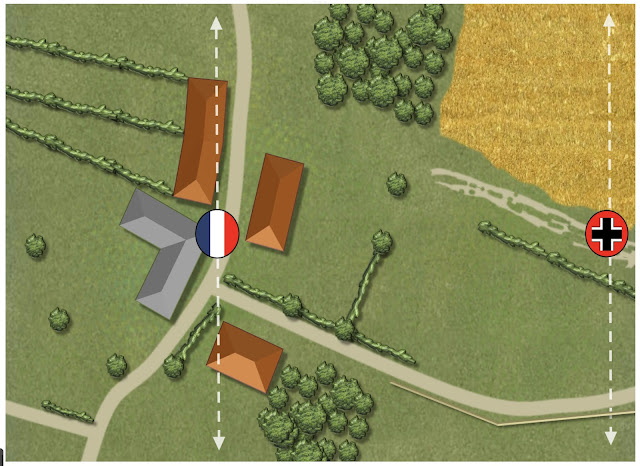
Noirmont - Creating an Intermediate Map for the Gembloux Gap
November 07, 2023
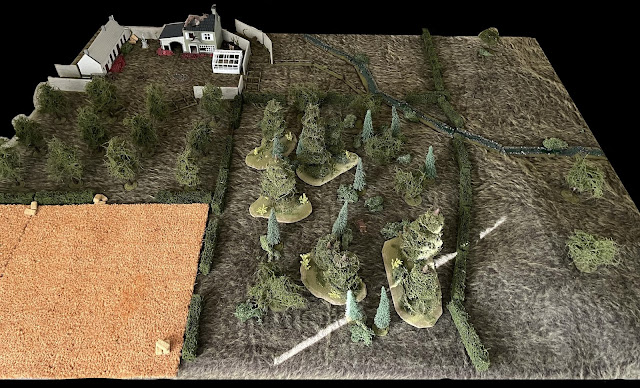
Taking the Gembloux Gap: French Counterattack into Noirmont (Table 2.5, Turn 7)
October 27, 2023
Taking the Gembloux Gap: Cast and Crew Pt 4
August 31, 2023
Taking the Gembloux Gap: Blitz on Villeroux III (Table 3, Turn 6)
July 19, 2023
Mission 7: Big Week II - Black Monday
November 28, 2022
Taking the Gembloux Gap: Blitz on Villeroux II (Table 3, Turn 5)
November 09, 2022
Taking the Gembloux Gap: Cast and Crew Pt 3
November 08, 2022
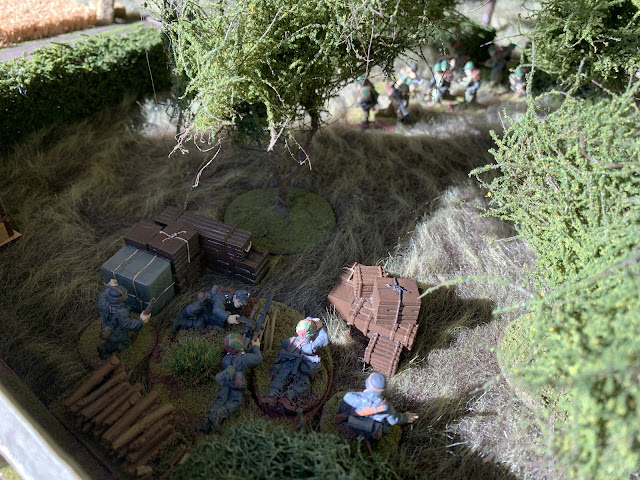
Cousteumont 1940 - Big Chain of Command
November 02, 2022
Taking the Gembloux Gap: Blitz on Villeroux (Table 3, Turn 4)
October 22, 2022
Mission 6: Big Week I - Airfield Attack
October 12, 2022
Taking the Gembloux Gap: The Culverts at Noirmont (Table 2, Turn 3)
October 11, 2022
Taking the Gembloux Gap: Cast and Crew Pt 2
October 05, 2022
Taking the Gembloux Gap: Palm-Off at Perbais II (Table 1, Turn 2)
July 11, 2022
Taking the Gembloux Gap: Palm-Off at Perbais (Table 1, Turn 1)
July 03, 2022
Taking the Gembloux Gap: Cast and Crew
February 07, 2022
Operation Martlet: The Last Ditch at Rauray (Table 6, Turn 10)
January 29, 2022
Operation Martlet: Winning Your Spurs (Table 5, Turn 9)
January 25, 2022
Operation Martlet: Striking at St Nicholas II (Table 4, Turn 8)
January 13, 2022
Operation Martlet: Striking at St Nicholas (Table 4, Turn 7)
December 03, 2021
Operation Martlet: Cast and Crew Pt 2
December 02, 2021
Operation Martlet: The Punch from Wünsche (Table 3.5, Turn 6)
October 17, 2021
Operation Martlet: Attacking the Hauptkampflinie (Table 3, Turn 5)
July 07, 2021
Operation Martlet: Pushing On (Table 2, Turn 4)
May 25, 2021
Operation Martlet: Probe Into Fonteney III (Table 1, Turn 3)
March 26, 2021
Operation Martlet: Probe Into Fonteney II (Table 1, Turn 2)
March 03, 2021
Operation Martlet: Probe Into Fonteney (Table 1, Turn 1)
March 03, 2021
Operation Martlet: Cast and Crew
January 14, 2021
French 1940 Platoon and Other Additions
December 11, 2020
Operation Martlet: Preparation
December 07, 2020
Mission 5: Convoy Cover
October 19, 2020
Mission 4: Attacking the Transports
October 17, 2020
Panzergrenadier Assault
October 13, 2020
Carriers for Chain of Command
October 09, 2020
Mission 3: Target for Today
September 27, 2020
Strategic Bombers Over the Reich
September 11, 2020
Mission 2: Railroad Target
September 09, 2020
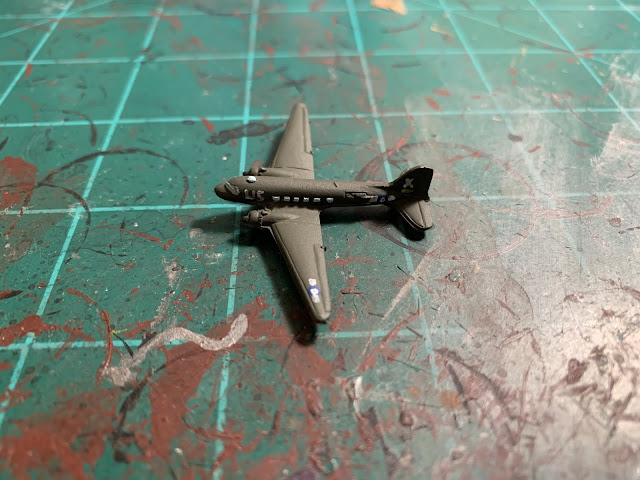
The First Transport is Away
September 07, 2020
Mission 1: First Foray into the Skies over France
September 06, 2020
33rd Fighter Squadron
September 02, 2020
Mini Messerschmitts
August 29, 2020
First Go